Configuration
Once you have installed the Connector, you need to set up access for your Exchangeaccount on both the Exchangeserver and within Evolution.
Exchange Server Configuration
Check with your system administrator to ensure that:
You have a valid account on the Exchangeserver.
You are permitted to access the account with WebDAV. This is the default setting for the Exchangeserver, so unless your system administrator has specifically turned it off, no changes should be necessary.
The Ximian website knowledge base, at support.ximian.com, has additional information about checking to make sure that your Exchangeserver will accept connections from Ximian Evolution.
Evolution Settings for Connecting to an ExchangeServer
Once you know that your server is ready for you to connect, start Ximian Evolution and select Tools->Mail Settings from any mail view.
Creating a New Exchange Account
If you would like to create a new account for your Exchange server, click the Add button in the accounts list. The account creation assistant will guide you through the process, which is also described in the section called The First Time you Start Ximian Evolution in Chapter 1. If you're not sure about any of the information you need, just ask your system administrator.
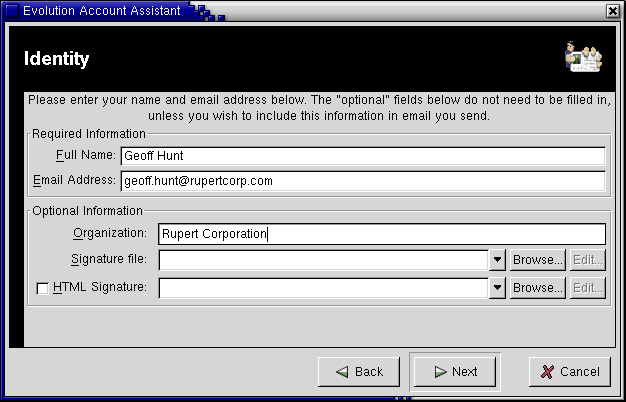
- Identity
Enter your name and email address. If you wish, you may add your organization and the location of your signature file. Only your name and email address are required.
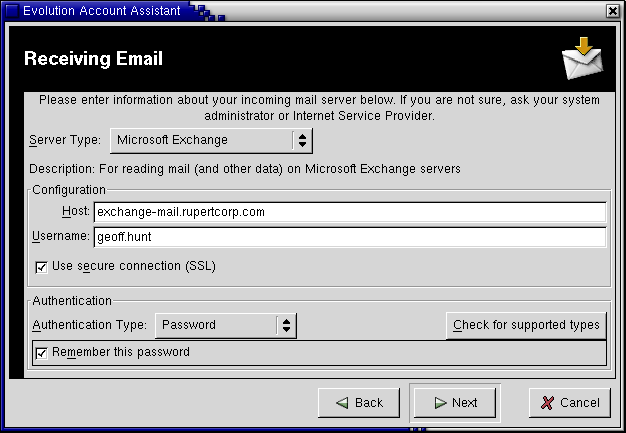
- Receiving Mail
In this step, you'll enter information about the way you check mail:
First, select Microsoft Exchange as your server type.
Enter the name of your Exchange email server, and the user name you would use to log in to a Windows workstation in your organization.
If you wish, select the box labelled Use secure connection (SSL), to take advantage of a more secure connection method. This may allow you to connect to the server from outside your firewall.
If you would like Evolution to remember your password, check the box labelled Remember this password.
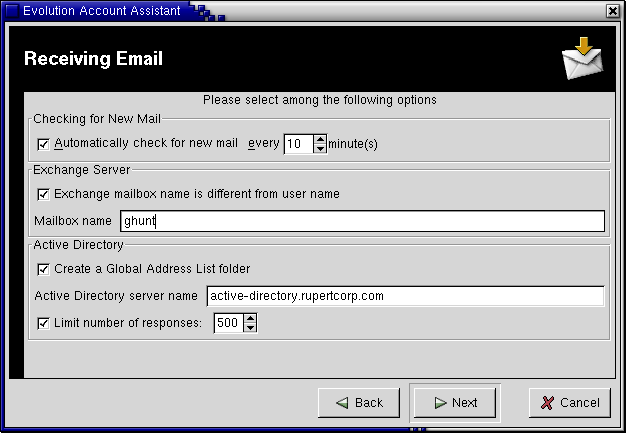
- Receiving Mail, Step Two
There are a few additional options in this step:
Checking for New Mail: If you would like to check for new mail automatically, click the checkbox and enter an interval in minutes.
Exchange Server: If your Exchange mailbox name is different from your Windows name, enter your mailbox name here.
Override Outlook Web Access Path: In most cases, the URL for web access is "http://server.company.com/exchange." If your system has a path that is not "exchange," check the box and enter the custom path here.
Active Directory: If you would like to use the Global Address List (GAL), check the box labelled Create a Global Address List folder and enter the name of the directory server. To avoid strain on the server, the maximum number of responses to any Active Directory query has been set to 500. If you would like to change that, you may do so here as well.
- Sending Mail
Select Microsoft Exchange as your email sending method. There is nothing else to do in this step.
- Account Management
Enter a name that you will use to remember this account. "Exchange Account" is a good suggestion. Note that you cannot have two accounts with the same name. If you'd like to make this your default account for sending email, check the Make this my default account box.
You're done. Click Finish and OK, then quit Evolution and start it again. Now you're ready to get to work on the Exchange server.
Changing an Existing Account to Work with Exchange
If you have an existing email account, and want to convert it to use for Exchange, select the account you want to convert and click the Edit button. You'll want to change settings in the following tabs of the account dialog:
- Identity
If your email address will change because you are moving to a new server, then change it in this tab. Otherwise, move to the next tab.
- Receiving Mail
Select Microsoft Exchange as your server type. Enter your name of your server next to Host, and the user name for your account next to Username. If your server supports SSL (Secure Socket Layer) encryption, it you can check the Use SSL box to take advantage of more secure data transfers.
- Receiving Options
Here, tab, you'll find some additional settings:
- Checking for New Mail
Select whether you would like to check for mail automatically, and if so, how often.
- Mailbox Name and Web Access Path
If your Exchange server requires you to use a different mailbox name from the name you use to log in, select the second check-box and enter the mailbox name. Check with your system administrator to be sure.
In most cases, the URL for web access is "http://server.company.com/exchange." If your system has a path that is not "exchange," check the box and enter the custom path here.
- Active Directory
If you would like to use the Global Address List (GAL) maintained on your Exchange server, click the tab labelled Receiving Options and check the box labelled Create a Global Address List folder. The GAL is maintained by your system administrator and you cannot add, change, or remove items from it using Ximian Evolution. However, you can use it to invite people to meetings and to look up addresses and other information. In many organizations, the GAL is stored on a different server from email. If this is the case, you should also specify the directory server name here.
- Sending Mail
If you will use your Exchange server to send as well as receive mail, select Microsoft Exchange as your server type, and enter the server name as the Host.
Once you have made those changes, click the OK button.
Then, quit Evolution and start it up again. Changes to the Ximian Connector accounts configuration are not active until you have restarted the application.